Showing posts with label Disney. Show all posts

Tuesday, May 24, 2011

Never Give Up!

Never Give Up!

This post title could be talking about the Mavs - Thunder playoff game last night, where the Mavs were down 15 points with less than 5 minutes to play and came back to win by 7 points in overtime... but it's not.   (GO MAVS!)

Never Give Up, in this case, refers to talented crafter Barbara Diane, who also happens to be a faithful Blink Blog reader and commenter.  She has not given up asking me to punch Snow White since I did the 7 Dwarfs.  I kept putting her off.  I tried referring her to this beautiful Snow White but she wanted one in "my" style.

Famous characters are hard because they have to be "just right" since everyone knows what they are supposed to look like.  Famous PRETTY characters are even HARDER because those attractive faces aren't exactly your basic punch shapes.  But Barbara Diane, for YOU,  DEAR YOU, I have attempted Snow White.


I picked this pose because my vision of her is standing in the forest singing to all the woodland creatures with birds landing on her outstretched arms.  Too many years since I watched the movie, but that is what I remember.

Face  - 1 inch circle - trimmed in slightly on one side (for cheek bone)
Hair - 1.25 inch circle and 1/2 inch circle
Bangs - 1/2 inch circle cut in half - cut edges are hidden under the headband
Headband - 1 inch circle near same hole, top of small heart for bow (middle drawn with marker)
Face - drawn on (don't laugh at my attempt)
Neck - word window
Collar - 1 3/8 inch circle - trimmed
Chest - medium oval
Bodice - Owl punch (yes, you read that right) - insert head end into bottom of the ornament punch to get pointed part at the waist - repunch foot end with 1 inch circle to get curved neckline
Strip on bodice - word window at edge of paper (super thin) - didn't attempt to adhere to front - wrapped the strip around the bodice and attached in the back
Skirt - wide oval
Sleeves - large oval, both ends repunched with 3/4 inch circle, then throw away bits of the brand new Blossoms Bouquet Triple Layer Punch (in Summer Mini) in red
Arms - wide heart to heart next to same hole
Hands - small heart to heart trimmed down on the thumb side

Monday, February 7, 2011

Guest Puncher - Marci Long - Bo Peep and Alien

Oh my, my, my, but we have some talented ladies out there in reader land.

Marci Long needed a Bo Peep and Alien from Toy Story to go with the Buzz Lightyear I had made.  I had no interest in working on them right then so I suggested she try it herself.  And what that heck was she waiting for?  Look at the awesome job she did...

Didn't need me at all did she?

Here's the link to my original Buzz for directions on him.

If Marci can design them, surely you can look at the photo and figure out how she did it.

I'm the lucky one - I got to see a DARLING photo of Marci's grand kids in their Halloween costumes of these same 3 Toy Story characters.  Marci made these characters for their goodie bags.  Now is that is a thoughtful grandma, huh?

Thanks Marci, for sharing these with me and allowing me to show them here. 

I have a feeling these will be copied many times over.  Please remember to give Marci credit for her work.

Saturday, November 27, 2010

Ask me now before I again become sane...

"You can't! It's impossible! I'm far too busy, so ask me now before I again become sane." 
--Edna Mode in the Incredibles.

Raise your hand if this quote is applicable to you.

I knew it!  I knew I'd get some of you "volunteer types" to relate.

I'm back working in my scrapbooks and I'll use Edna's quote as I scrap about my over volunteering days. 

Not that I was a fashion designer for superheroes (puh-lease, the seams would come undone before the the first villain showed his face!)  But  "I'll do it" was my theme song for many years - accompanied by a raised hand and an eager grin.  (I assure you, those days are gone) 

Now I offer free seminars where I have ladies stand in front of the mirror and practice saying "No, I can't help you this time".   I have an entire pep talk ready to roll at a moments notice.  I'm pretty sure it has brought a few ladies back from the edge of insanity.

Of course with Edna's quote - we MUST have the darling lady herself...

Just like the fashion designers in movies (and maybe real life, who knows?) Edna is dressed in all black - which might make seeing her "parts" a little difficult.  Sorry.  Hopefully between the picture and the parts list you can figure it out.

Head - ornament - rounded the chin just a little bit with scissors
Hair - wide oval parts and word window for bangs - if part of your oval sticks out above the bangs just trim it off straight
Nose - circle itty bitty punch pack
Eyes - circle itty bitty punch pack trimmed on bottom, marker for black parts
Glasses - 3/4 inch circle around 1/2 inch circle hole - make a spare and use just a tiny snip for the nose bridge
Lips - circle itty bitty punch pact at the end of a modern label HOLE  - I did her lips in perfect plum and used my finger to apply just a little perfect plum ink on her check
Neck - word window
Body - large oval snipped with a circle at neckline
Skirt - word windows  - 1 full size -3 progressively shortened by re-punching
Pink part - narrow heart to heart next to same hole
Arms - word window folded over at elbow
Legs - modern label trimmed from middle bump on an angle (both sides) - folded over at ankle to make feet
Hands - small heart cut in half - then I cut a little notch to distinguish her thumbs

You could emboss black on the black of her dress to make it more "visible".  The Disney character Edna has lots of texture on her sleeves - I left that off since I think her "face" makes the character and the clothes are secondary (plus I'm a bit on the lazy side)


Saturday, August 21, 2010

Hopping and Buzzing

If you are on Final Blog Hop of the 2010 VC Rocks Season, and arrived here from Angela Walters' darling Life with a Weiner Dog blog         
WELCOME!
If you are hopping and find any broken links or just want to start the hop at the beginning, you can click HERE.

Since there is no set "theme" for this hop - I'm am sticking to my usual antics and giving you Punch Art.

 And today it is BUZZ!

 No, not the little honey bee kinda buzzzzzzzzzzzzzzzzz

It is the "TO INFINITY AND BEYOND" kinda Buzz.

I have had MANY requests for Woody and Buzz from the Toy Story movies. Woody is easy since I just have to give directions to where guest puncher, Sheila White, did him months ago. But no one has ever sent me a Buzz Lightyear - so I made him for today's post.

Of course, the only use I personally have for a punched Buzz is to show him to YOU - so you can ohhh and ahhh over him.

So you start the appropriate ohhhing and ahhhing, and while you are doing that, I'll tell you how I made him.


Warning: Buzz contains 2 retired punches - when you read the directions below, you will find that I give you suggestions on ways to get the same effect.  Am I a good little blogger, or what?

Helmet is the new 2.5 inch circle from vellum and another 2.5 inch circle punched close to that hole.

Face - RETIRED key tag punch in retired blush blossom, another key tag punch in perfect plum behind it.  (You can get the same effect from a 2x1 inch rectangle if you round the corners)  And I suggest blushing bride as your flesh tone. (If you didn't follow my directions to stock up on blush blossom paper.)

Eyes - small circle from Itty Bitty Punch Pack in white, 1/2 of the same thing in flesh, standard hole punch in bashful blue, drew in black with marker

Eyebrows - wide Heart to Heart next to the wide Heart to Heart hole so you get a funny shaped sliver from the top of the heart - cut that in half to get two curved eyebrows.

Nose - small circle from Itty Bitty Punch Pack trimmed to a triangle

Mouth - tip of word window

Chin - small circle from Itty Bitty Punch Pack

Neck - breast from owl punch (not necessary - you could easily use a circle - I'm just reporting what I actually grabbed)

Top of suit - small oval in perfect plum, large oval in certainly celery, wide oval in perfect plum

Suit base - 2.5 inch circle in white - trimmed flat

Breast piece - Full Heart in certainly celery cut in half  (pointy ends are placed right at the edge of the perfect plum wide oval)

Breast decorations - RETIRED slot punch, small circle from Itty Bitty Punch Pack, 3/4 inch circle in white, 1/2 inch circle in Baja Breeze   (you can substitute little strips of paper for the slot punch - they just won't be rounded on the ends)

Arms are layered as follows:
  • 1 inch circle in black
  • 3/4 inch circle in gray
  • Small oval in white (end punched away with the 3/4 inch circle)
  • 3/4 inch circle in certainly celery
  • Small oval in white
Hands are ends of modern label punched with the 3/4 inch circle - slot punch added at wrist

 Mid Section is a Round Tab Punch run through the crimper, small oval in celery, small oval in white that had two leg holes punched with a 3/4 inch circle

Legs - small oval thighs, modern label calves (snipped to a point at the knee)

Feet - 1 inch circle, cut in half to get two feet - trimmed flat at the heel,  1/2 inch circle (cut in half) at the toes.

 ***** 
FYI - Buzz is approximately 7 inches tall - so he is better to use on a scrapbook page.  For a standard size card you will need to leave part of him off.

ANOTHER FYI - On Monday this blog turns 1 year old, so Buzz is the final post of its infancy.  May the Inspiration Fairy take notes from Buzz and keep providing ideas "to Infinity and beyond".

Want to see more fun Stampin' Up! stuff?  Continue on the hop and visit Holly at InkPaperStamps to see what creative thing she has dreamed up for you.

 Have a great weekend!

Wednesday, July 7, 2010

Most Requested Punch Art

I continue to get frequent requests to finish the tutorials for the 7 Dwarfs.

I don't wanna.

The fun for me in all this is the creating not the explaining.

I have showed you Sneezy, Doc and Grumpy so I won't do separate posts for the other 4 dwarfs (boring) but I will give you some tips so you can go it on your own from the photo.

Happy is similar to Doc
leave off the glasses
add tiny scraps of white for eyebrows instead of pen marks
draw open happy mouth
eyes are pieces of big heart from Heart to Heart punch - snip off to get shape AND you will have to slim them down - making them more narrow - blacks of the eyes are just drawn on with pen/marker

Bashful is similar to Happy (above)
Beard is the same scallop oval but you don't need to trim it - just turn it lengthwise
Eyes should be trimmed even more narrow than Happy and add eyelashes, pen/marker eyebrows and mouth
I also flattened out the top of his nose with scissors

Sleepy has Sneezy's hat but the face is like Bashful (above)
except I flattened the bottom (instead of the top) of the nose
Make the eyes from blush blossom. His eyes do not have to be narrow like Bashful
add pen marks at the bottom of eyes and draw mouth
his eyebrows are slivers punched with a standard hole punch around a standard size hole.

Dopey
Sneezy style hat but point the oval up
No beard
wing from Two Step Bird for his ears
blue eyes
black pen work was too stark with those eyes so I think I just grabbed a caramel marker


You should also check out Glenda Mollets' blog HERE and scroll down - she put all my dwarfs on cards but she also added some of their bodies.  Really Cute!  She did a fabulous job.

Tuesday, April 27, 2010

Tigger Again

No, don't get all excited.  This isn't Tigger in another pose.  I'm showing you how I wound up using him.

Within 24 hours of his creation, I used Tigger for a birthday card.  Hubby's best friend Scott was having one of those "milestone" birthdays - I won't mention which one.

I made a tri-shutter card for him.  Link to tri-fold directions here. These are not hard to make and they are fun and impressive.  You can really embellish them or you can leave this card a little plainer - which is what I did since this is a "guy card".


What I did different was to make the white circle on the middle panel OPEN up to reveal the answer to my question (They are both "one of a kind")

Then I decorated some of the back of the card to add a spot for signing our names - but didn't take a photo of that.  Paper, ink, signatures... I'm pretty sure you can imagine it.

I'm also pretty sure Scott doesn't read my blog (his wife might)- but if he does he'll know how much I love him - to give up my favorite punch character EVER after having just a few hours with it.   Love ya Scotty!

Monday, April 26, 2010

T-i-double guh-err

I have had polls and questions where I ask you which of the punch art characters were your favorites - many of you have a hard time deciding. 

Well, I don't have any problems deciding because THIS has to be MY favorite punch art creation EVER.

Do you want to see it?

The answer does not matter because I can't wait another minute to show this to you.


"The wonderful thing about Tiggers
Is Tiggers are wonderful things
Their tops are made out of rubber
Their bottoms are made out of springs
They're bouncy trouncy
Flouncy pouncy
Fun fun fun fun FUN
But the most wonderful thing about Tiggers is I'm the only one!"

click here to hear the whole song

This won't be the ONLY one, because at least half a dozen of you will fall in love with him and make him for yourselves!

Here is the how to:
body - large oval in barely banana (retiring in June) 2 large oval in Pumpkin pie
arms - word window
hands - wide heart from heart to heart - trim to get "thumb"
legs - butterfly punch trimmed as shown in photo below
feet - 3/4 inch circle trimmed
soles of feet - shortened word window in chocolate chip
tail - modern label (make little snips in with scissors)
bottom jaw - small oval trimmed in on one side (see photo below)
inside mouth - word window piece in bravo burgundy
muzzle - 3/4 inch circle
nose - new circle (available May 1 in punch pack) in pink
head - piece of 1.25 inch circle (see photo below)
eyes - piece of 3/4 inch circle
ears - pieces of 1/2 inch circle and new circle (available May 1 in punch pack)

I outlined most of the pieces in black and scribbled on the stripes  - drew on eyes and eyebrows.


Tigger is my favorite Hundred Acre Wood citizen!  Most of them make me grin, he makes me LAUGH!

Sunday, April 25, 2010

I think there is a weed in his garden...


I don't know how I'll use Rabbit - I gave him a grumpy face because that is what I remember from the videos my kids used to watch. I think he has spied a weed in his garden!

You can make him 'happier' by changing where you put the black in his eye and changing his eyebrow shape and position.  Play with it and see what you can do.

Body - 4 large ovals - white one trimmed as shown in photo below
Head - wide oval trimmed as shown
Neck - word window
Ears - small oval trimmed
Ear center - scrap cut by hand
Muzzle - edge of butterfly punch repunched with end of small oval
Nose - new circle
Feet - small oval, flat on bottom
Arms - square next to square hole
Hands - new flower from Punch Pack (available May 1) - trim some 'petals' off
Tail - 3/4 inch circle - used distressing tool to "fluff" it


The hoe was just so he'd have something to hold - you could add a carrot or flower or a pot of honey for his friend Pooh!

Saturday, April 24, 2010

Oh d-d-dear-dear

"It's hard to be brave when you are a very small animal"


Piglet! I love the stammering little pink guy....

I don't exactly know why I picked this lying down pose... but you 'get what you get' around here.  

This is how I plan to use him - as a title element on a Book of Me page about small things that are important.


Body - large oval - slightly curved lines drawn with marker
Arms and feet  - wide heart in heart to heart - feet are trimmed down on one side of the heart (wanted them to look smaller since they are supposed to be "behind" the rest of him in this pose)
Ears - wide heart in heart to heart snipped into two ears
Nose - new circle punch (available May 1) snipped on the bottom
Face - large oval trimmed as shown in this photo:

Friday, April 23, 2010

Chubby little cubby all stuffed with fluff...

You knew when you saw Eeyore there would be more characters from the Hundred Acre Wood, didn't you?

I've been humming the song for a couple of days   "..chubby little cubby all stuffed with fluff"

Today, of course, is Pooh.


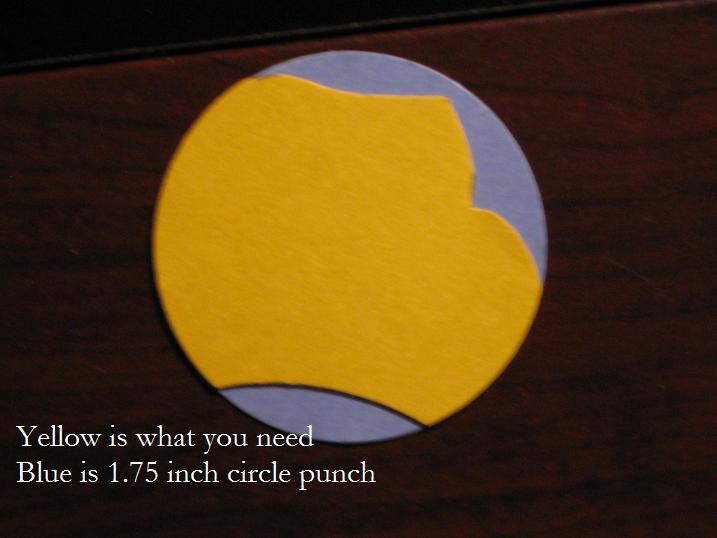
Hardest part is his head.   It is a 1.75 circle but you have to do some trimming - like this:


Body - 1.75 circle - thinned just a TINY bit by reinserting into same punch - like this:

It had to be "thinned" to fit in the shirt.

Shirt - Butterfly  - trimmed as shown in this photo:

You have to admit this shirt is pretty genius, don't ya?

Arms - word window
Legs - wide heart in heart to heart
Ears - new circle punch (available May 1 in a punch pack)
Nose - standard hole punch
Soles of feet - piece of 1/2 inch circle punch

Draw on face, outline parts, sponge area around eyes - you need the shading for depth.  I used Crushed Curry for Pooh, Real Red for shirt, More Mustard for soles of feet, Black for nose.

Here he is - floating with his balloons...


Thursday, April 22, 2010

Gloomy Guy...

"One can't complain. I have my friends.
Someone spoke to me only yesterday."


Don't just love gloomy ol' Eeyore?  I know he is described as gray in the stories, but in my kid's old VHS movies he is blue - so ballet blue (retiring in June) is what I did here.

SU really doesn't have the right size punches for his body - so I pieced some together - but you might have better results using your circle scissors plus or (gasp!) using other punches to get it bigger.

Body - 1.75 circle plus a wide oval to make his body longer (taller - whichever word you prefer)
Neck - large oval
Mane - cross hatch or plus sign looking punch (NEW in summer mini  available 5/1/10 - sold in a pack with 2 other punches)
Head - wide oval trimmed in a little on each side
Muzzle - 1 3/8 circle in apricot appeal (also retiring in June) top rounded with wide oval
Eye - small heart punch cut in half, standard hole punch
Ears - large oval cut in half (not a straight cut, kinda curvy), piece of small oval in rich razzleberry
Front leg - modern label
Back leg - large oval - trimmed in to distinguish foot
Tail - hand cut - using hole from small oval as guide
Tail hair - small heart, snipped in like grass
Bow - smallest from heart to heart and standard hole punch
Thumbtack holding tail - throwaway piece from spiral punch - trimmed the "head" down to shorten


If you are a demo you should check Belinda Johnson's StampinConnection gallery for her front facing Eeyore - she uses a round tab punch for his head.  If you aren't a demo, you are out of luck seeing this - unless of course you want to join us......  email me!

Monday, March 15, 2010

Another Duck

You probably guessed this would happen today.  When you do one famous duck, how can you not do the other?  We want to keep this fair, right?

Donald has loads of  'poses' to choose from, and I almost did an "angry" duck because it was funny but I thought you'd be more likely to use him if he was in a happy mood:

Here is the 'in process' photo:

One eye is small ovals and 1/2 width word window
The other is large ovals and word window
For the hat - trim your wide oval into a "bean" shape (well, that is what it looks like to me - a blue bean)
I think you can see the rest.

And here is a comparison of outlining your pieces with a black marker versus leaving them plain

I did not outline the beak because I didn't want to draw attention to the "seams" of the punch pieces.
And I didn't outline the entire way around the smaller white eye oval
(Actually I did and then rejected it and had to make another)

Sunday, January 31, 2010

Chipmunks

Kellie Paxton made a second request (don't worry, she isn't being greedy, she says it is her last for awhile).  Her husband got himself in a pickle - read this:

'I have a group of ladies that meet the 2nd Tuesday of each month. My husband, Michael goes with me. He takes pictures and helps with the projects and whatnot. Well, last month the ladies were joking with him and told him that he was welcome to bring some Chippendales with him next time.

And of course he says, "I will see what I can do".

So in all his cleverness he wants to bring Chip and Dale the chipmunks!

What do you think? Is it possible to punch chipmunks? "

Well, these are not EXACTLY those chipmunks but I hope close enough to get him a few laughs.


Here is your pictorial how to:  See photo below for which color to punch.

Row 1) Approx 2.5 inch circle from circle scissor plus for head  - large oval and 5 pt flower for ears

Row 2) 2 full hearts, 2 small ovals, 1 3/8 inch circle for eyes

Row 3) two 1.25 circle, large oval, wing from Two Step Bird, 1/2 inch circle for cheeks and nose

Row 4) two large oval, butterfly,small oval, tiny scrap for mouth

Trim as shown below....
Start your assembly...
To make the "other" chipmunk just change the nose to red and use two teeth instead of one.

The Chip and Dale cartoon I remember watching had them being brought into Mickey's house in a Christmas tree he chopped down, then they ran around in the tree moving ornaments as he decorated.  So I did this layout and will use it for photos of decorating our tree.  (not printed yet)


Friday, January 8, 2010

More White Beards - Get your Grump On


For my "get well basket" project using Grumpy, I decided to include some pain reliever 'for when you are feeling Grumpy'.  I picked up a little sample size pack at the drugstore check out and cleverly attached it to a little card like this:

A slot punch and ribbon - a very low tech solution.
Used red sticky strip to secure this flap to the card base
See photo below:


Here is the scoop on making Grumpy...


Click to see the photo larger and read the words

Chocolate Chip - wide oval (not the large oval shown in the photo), HOLE from a large oval punched with a wide oval to get the hat edge

Blush Blossom - 1 inch circle, leaf from Two Step Bird, Small Oval

White - two Scallop Oval, re-punch one of them as shown, smallest heart from Heart to Heart

Black - two standard hole punch, HOLE from narrow heart in Heart to Heart -->>  move punch up from the hole and punch to get the narrow sliver for eyebrows, toss the black heart and scrap shown in the photo

Sponge Bravo Burgundy ink around the nose
Place the black of the eye at the TOP of the heart - add white highlight with gel pen
Layer beard parts as shown


Almost assembled but gosh, he doesn't look Grumpy yet!  That is because the EYEBROWS are the key to his personality.


 NOW he is grumpy!

Nose is popped up on a dimensional.

I like Grumpy - he may be my fave of the punched dwarfs - I just don't want to look or act like him.  But I guess keeping those eyebrows plucked would make anyone grumpy.  (grin)


Thursday, January 7, 2010

More White Beards - Just what the Doc ordered

Woo hoo!  Back to PUNCH ART today!

I know some of you were disappointed that the blog focus wasn't punch stuff the past few days - but giving you all that scrapbook yakking (a class I had already prepared for something else) gave me
  • time to spend with college girl (she left yesterday afternoon)
  • AND gave me time to work up some new punch stuff,
  • AND hopefully helped the three of you who actually read through ALL those words!
This dwarf project is moving slowly, not because I don't WANT to show you, but because my "cleverness"  only relates to punching stuff NOT finishing projects.

I finally came up with a way to use Doc.  (Remember, I'm trying to use the dwarfs in unique ways to make a "get well" basket...)


What do you think?  Will that work? Oh, who cares! - you just came for the tutorial anyway, right? (grin)

Here is a "how to" for Doc.

  • More Mustard - full heart (trimmed with scissors) and large oval HOLE punched with wide oval
  • Blush Blossom - 1 inch circle, 1/2 inch circle, small oval
  • Basic Black - two standard hole punch
  • Vellum, sponged with bashful blue - two standard hole punch
  • White - smallest heart in Heart to Heart


Click on the photo in order to read the words

Add pen marks for folds on hat, eyebrows, glasses "ear pieces"
MAKE SURE you get your black eyes CLOSE (as in overlapping) because the glasses will go on the outside of the black parts.  Add white highlight with gel pen.
I sponged just a little bravo burgundy on the top of his nose.


To attach the glasses - I rolled up a mini glue dot and stuck that wad at the bottom of his eyes - so your glasses are just attached at the very bottom of the 'lens'.  This glue wad will show a little bit now but will be covered by his cheeks and nose.


I drew on a smile but it is not noticeable with the nose attached so you can skip that if you want.

 
You might notice my "fold" lines are a bit thick on the right Doc - I opened the wrong end of my stampin' write journal pen.  Oops!

I have "ideas" for most of the dwarfs - I just have to execute them. (Execute: To perform or carry out what is required  i.e., make the projects NOT execute- as in kill the dwarfs).

But I need HELP on one.  I'm struggling with a way to use Bashful in the basket.  The best I've got so far is putting him on a card and saying "Don't be Bashful, call me if you need anything".   Any better ideas out there? 


Monday, December 28, 2009

More White Beards - Sneezy

I am not good on sending get well cards.  I have good intentions but by the time I get around to making the card AND getting it mailed... friends have long since recovered.  The solution?  Have some cards ready to use.  Yeah, I know, you have probably been doing that for years but sometimes I'm a little behind in the smart department.

But now that I have some cute little dwarfs punched (with names like Sneezy and Doc) I think I can get excited about have those get well cards ready to roll.

But I'm not in the card mood today so I have to do something else.  I think I'm going to make a basket of dwarf themed things to drop off when someone is under the weather.  And the first is :  "For when you are Sneezy"


Here is the how to for Sneezy


Hat - large oval and 1/2 large oval hole in apricot appeal
Face - 1.25 circle. large oval, heart to heart and leaf from Two Step Bird in blush blossom
Eyes - small heart in white, standard hole punch in black
Beard - circle scallop
NOTE  = Small Heart and Two Step Bird are available from SU on January 5
Trim as shown below:
(use wide oval to trim around 1/2 large oval hole)

Sponge with bravo burgundy and add a couple of pen lines as shown


I have ideas for some of our other dwarfs - but college girl is still in town - will post soon

Sunday, December 27, 2009

More White Beards

Did you miss me?

Did you have a good holiday?

We had snow all day Christmas Eve! (This is North Texas - and this is my first white Christmas EVER!)


College girl in the snow

We had good food and good times with family - and that makes a successful holiday in my book.  Not everything went perfectly - the drive to my parents house was a bit harrowing but hubby drove us safely down the slick roads and around all the accidents (Many Texans don't know how to drive on snow or ice) and I couldn't find a crucial family recipe but it all turned out well in the end.

I haven't spent much time at my desk but I did get in a little time.  It appears that even with all those Santas I punched, I didn't get my fill of men in hats and white beards...


Way back when I was first starting the "pointy chin men" my upline, Jenifer, commented something like "what's next? the seven dwarfs?"  I said I wasn't going to make them, but I did.  She planted that little idea seed and it finally took root.

I'll tell you how I made them when I figure out how I'm going to use them... 

Sneezy on a get well card will probably come first. 

Can you remember all the names?