In some areas of my life I am VERY organized.
Most areas I have pretty much under control...
And, as you might guess, in some areas, all "h-e-double hockey sticks" has broken loose.
My recipes fall in the last category. I don't like to cook. I don't cook much. So organizing recipes has never been much of a priority.
Notice I said
I don't cook. I didn't say
I don't collect recipes.
I have them in books people have given me.
I have them in books I've bought (with the best of intentions).
I have the ones I have copied from friends after enjoying their delicious creations.
I have the ones I snipped from the newspaper because they sounded good.
I have the ones I've torn from magazines because they promise to be quick and easy.
I have the 10 recipes I actually use.
I have a few special holiday ones.
AND best of all I have the PRETTY and yummy ones I've gotten from 6x6 recipe card swaps.
I realized I know exactly where the pretty ones are because I have them all together with easy access on one great holder.
So...., I am making the recipes I use into 6x6 cards (even though I'm not in a swap) so I can find them when I need them.
And here is my favorite one to lose (but not anymore)
I tried to not put a pumpkin on the page because that is so "obvious" but I couldn't help myself!!
For the 2 of you who have never punched a pumpkin - just layer 3 large ovals, use a scrap for the stem and curl a very thin strip of paper around your paper piercer (or stylus) to make the curly vine.
Paper craft ideas you can take from this page:
When you have an "empty" spot and nothing to put in it - pull out your word window and wrap it around the edge of your page:
I added some tiny buttons from my stash but you could leave them plain or add a brad. This used to be one of my fave tricks on cards and pages that "needed something" but somehow I stopped using it. It popped into my brain after I spent about 10 minutes pawing through my embellishments looking for the RIGHT THING to finish this page. I should have KNOWN the answer would be in my punch drawer!
Another thing you might not realize is that you can run chipboard through your Big Shot with texture plates! I suspect this wouldn't work with embossing folders (and I don't want to mess one up trying it) but texture plates work well as you can see with my "P"
The "b" is textured also but it is just paper, not chipboard, because I needed to layer the other lettering on top of it.
My last tip involves the paper the recipe is printed on. I tried and tried to get my printer to take so saffron cardstock (sometimes it will - sometimes it balks at the weight of SU cardstock). Last night was a night to reject it. My solution was to print on whisper white and take the ink-pad directly to the paper. This gave me great distressing which matches the background paper I had chosen. I like it better than if the so saffron had worked.
This recipe came from Janis Boyd, a WONDERFUL cook, who once upon a time worked with my hubby.
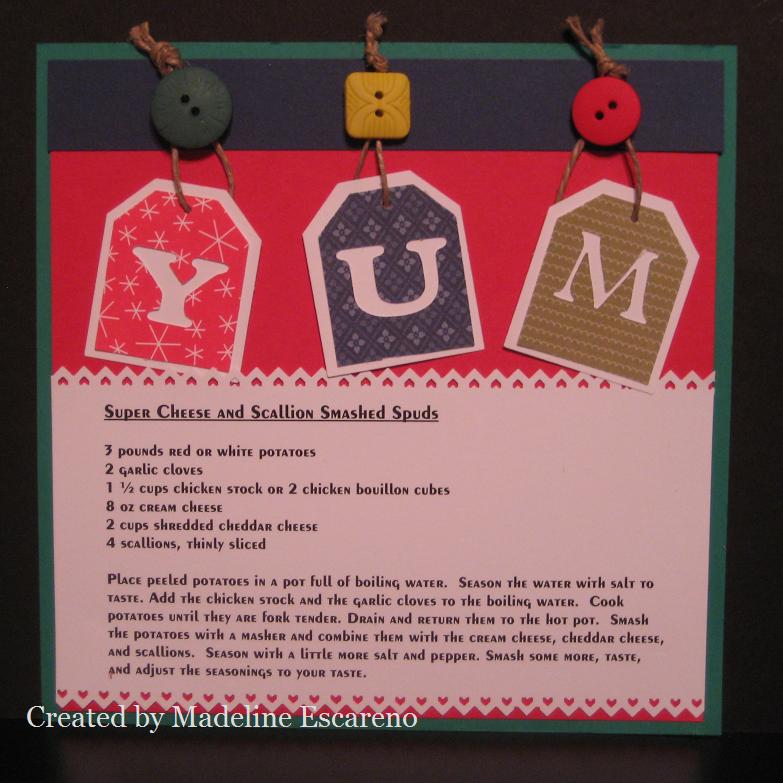
Here is the recipe if you don't want to struggle to read the photo:
3 cups sugar
1 cup oil
4 eggs
½ tsp salt
1 tsp nutmeg
3 cups flour
1 tsp cinnamon
2 tsp soda
1 cup nuts (optional)
2 cups (1 can) pumpkin
2/3 cup water
Cream sugar, oil & eggs. Add the rest and mix well.
Cook in greased and floured pans at 350 degrees for 1 hour.
(Makes 3 of the throw away loaf pans) Freezes well.