
FULL hippie directions follow:

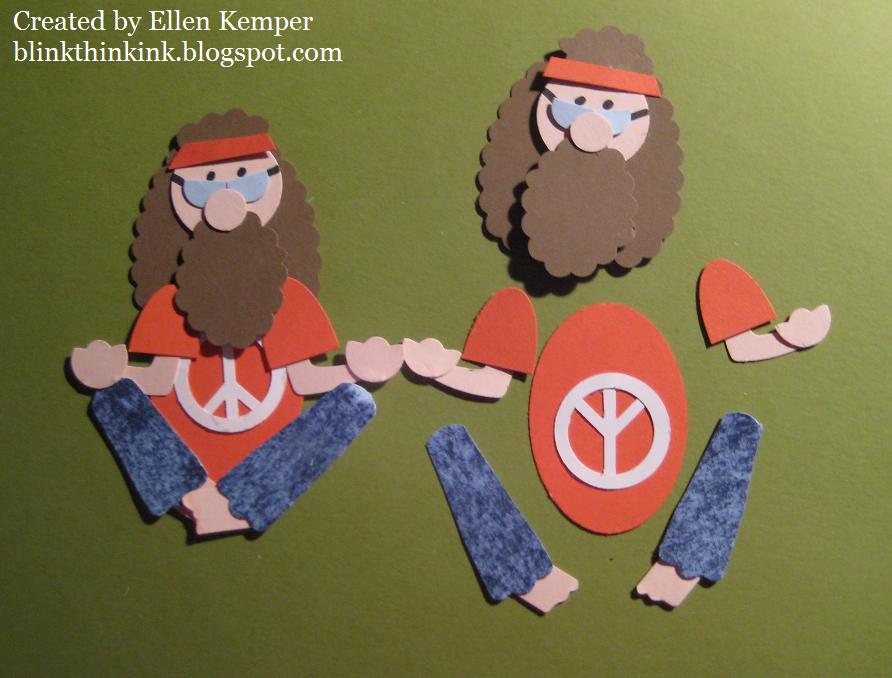
Then you have to modify some of these parts - I didn't show the modern label before punching hands out - but the rest of the "parts" that need to be altered are shown PUNCHED and then MODIFIED (photo below)

Snowflake trimmed down
Modern label punched with 1/2 circle for hands
Modern label trimmed to slant then knees rounded
Word window - cut ends for glasses
Word window - fold in half - trim toes by hand - cut apart (this way your toes are identical for both feet)
Scallop oval - repunched for beard and bangs - TIP: slide in at the "corner" of the scallop oval for bangs - if you stick in straight in for the tip - you won't get the shape you want.
Small oval - cut in half for sleeves

Now you can see how he takes shape. Marker for eyes and earpiece of glasses. Tip: attach middle of peace sign at the bottom, then at the top, THEN trim off the extra snowflake at the top. Heels don't matter because they are hidden by jeans.
He will look weird in the face until you get the nose on - don't worry - just keep on sticking his parts on.
I use SU Mini glue dots for assembly. If a piece is small I simply roll the glue dot up to a thin line (wad) of sticky.
5 comments:
What a great character, you make it look so easy. Great use of the snowflake punch too. Looking forward to your use of the new punches. I looked at them by squinting my eyes so I could see another use of them... but nothing... so I'll wait for your genius! I look forward to your blog every day. Tks for sharing!
thanks for the great how to's...
Sara
Hello!
Love your hippie guy! He is great! :<) Thanks for the tutorial - I will have to make one of these!
Wishing you a good week!
Hugs,
Barbara Diane
Whoa, Dude! Far Out, Man, love this guy, I think I'm having flashbacks, lol.
hugs,
Ohh.. too darn funny! Deja Vu!
Post a Comment